Automating GitHub repo access using Stripe checkout webhooks
The other day I made my first sale on my recently released Remix starter kit Launchway. For those unfamiliar, when you buy a starter kit, what you're really purchasing is access to the repository containing all the source code.
I made an amateur mistake in completely forgetting to automate the process of granting GitHub repo access after purchase and only I discovered this after the customer asked me why they hadn't yet received anything. Whoops.
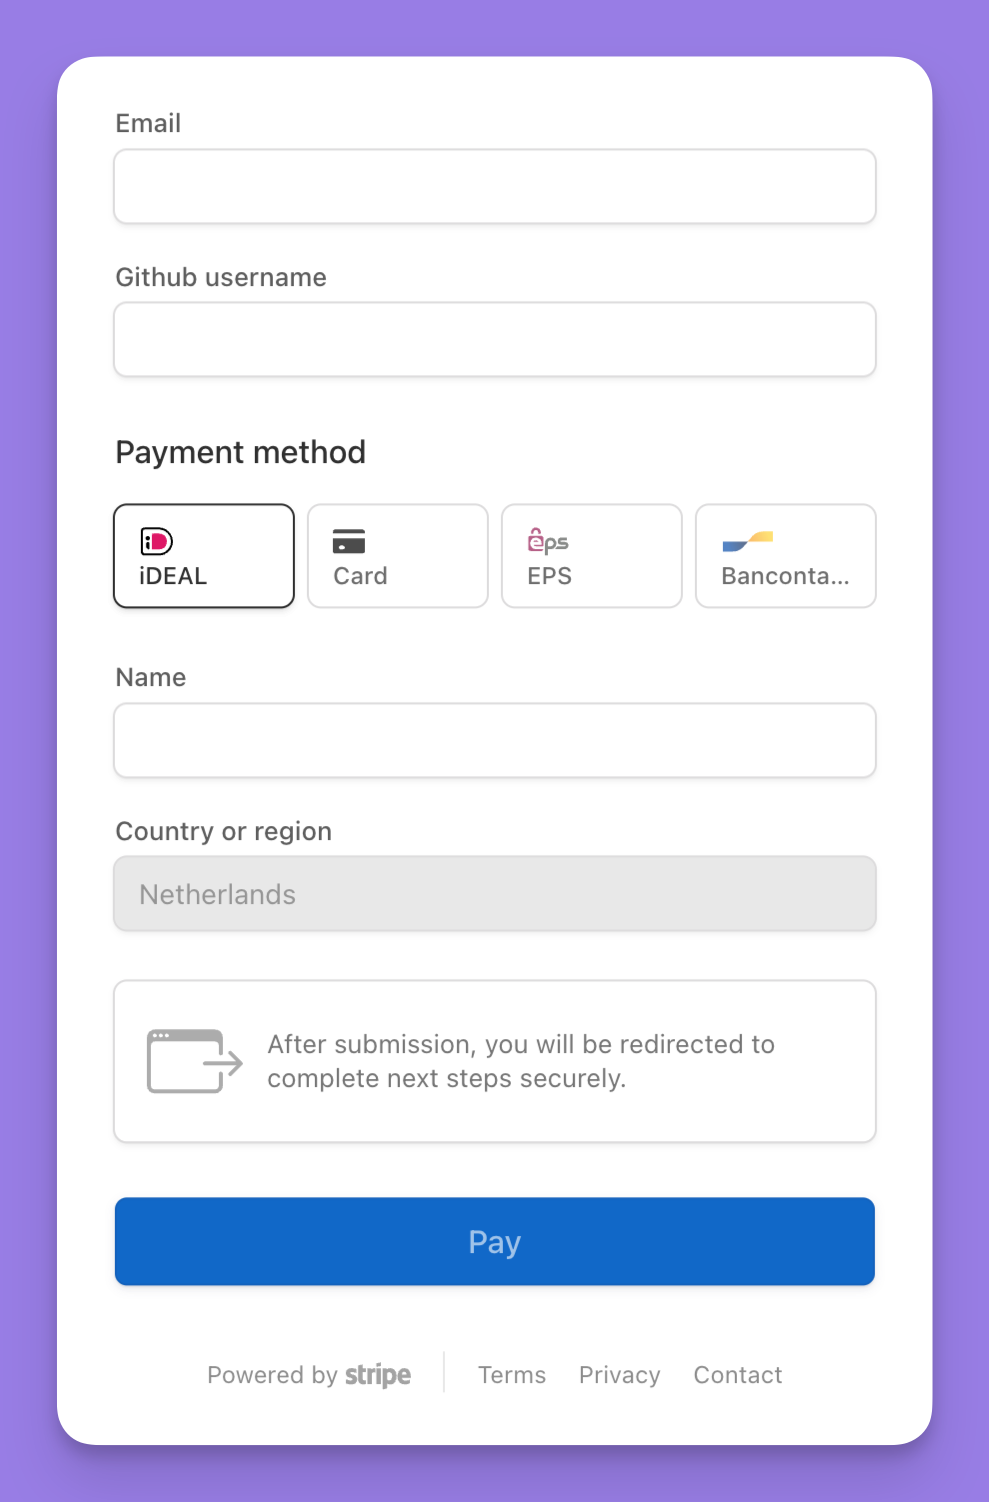
To fix this I automated the entire process so that the user can enter their Github username at checkout and be granted instant access afterwards and I thought I'd share how I did it.
Custom fields
Stripe has a really handy "custom fields" option buried in the advanced settings of Payment Links. You can configure these to say anything you want and when you receive webhooks it will automatically generate a computer-readable name so you can easily extract it out in webhook handlers.

Here's how it looks in webhook events
{ "id": "evt_1QBYBjDXB6RQxLSGhjibb9QA", "data": { "object": { "custom_fields": [ { "key": "githubusername", "label": { "custom": "Github username", "type": "custom" }, "optional": false, "text": { "default_value": null, "maximum_length": null, "minimum_length": null, "value": "checkout_username_will_be_here" }, "type": "text" } ] } } }
Configuring the webhook in Stripe
The webhook itself only needs to listen to one event - checkout.session.completed. Configure a webhook endpoint to point to the live environment where you'll handle the webhook (e.g. https://example.com/api/webhook/stripe) and configure it to listen only to checkout.session.completed events. Make sure to securely store the webhook secret.
Afterwards, create a new dedicated API key with only the "Webhook Endpoints - Read" permissions.
You don't technically need to setup a dedicated endpoint and API for this if you already have one, but it's always a good idea to provide as little scope and permissions to API keys and webhooks as possible in case any of the sensitive keys are compromised.
After this you should have the following two environment variables
STRIPE_SECRET_KEY=rk_live_..... STRIPE_WEBHOOK_SECRET=whsec_......
Github access token
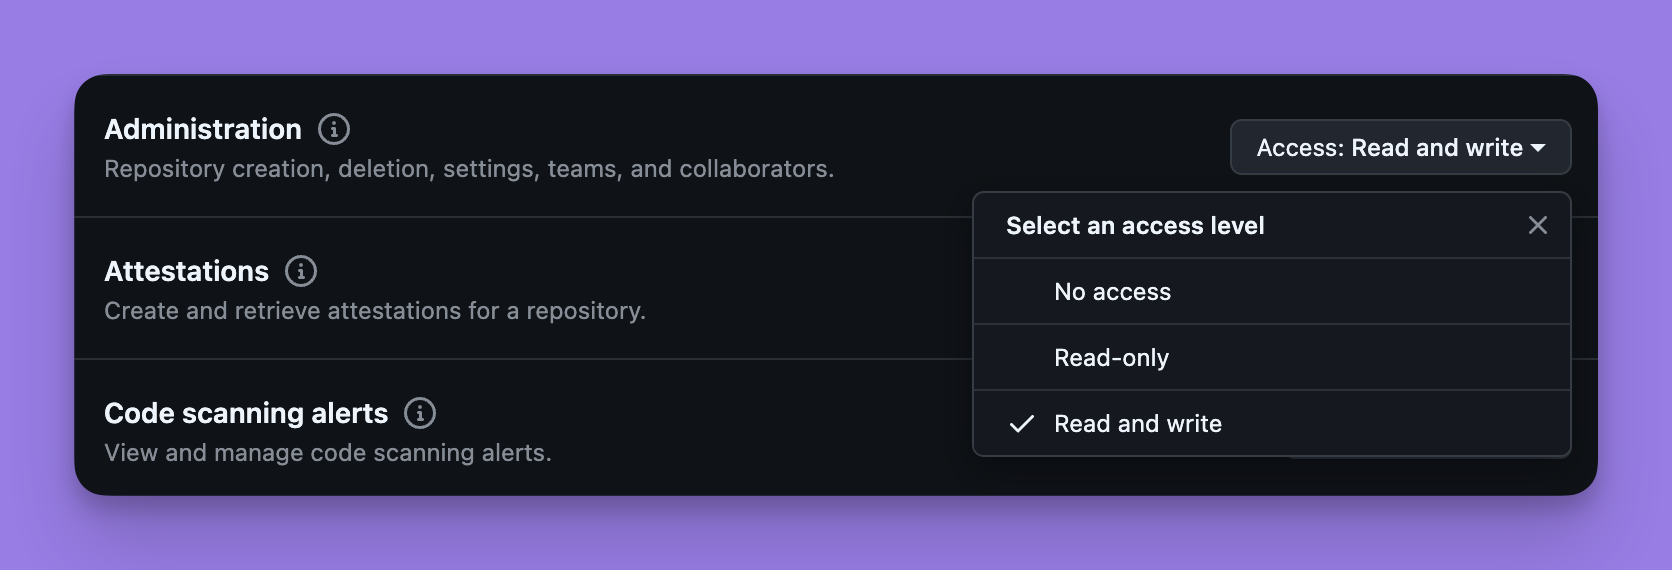
Go to your Personal access tokens page in Github and generate a new token. In the "Repository access" section, select the repositories you want to grant access to, then grant the "Administration - Read and write" permission

After this you should have the following environment variable
GITHUB_PERSONAL_ACCESS_TOKEN=github_pat_....
Writing the webhook handler
The exact implementation will differ depending on what language, framework or environment you're using but the steps are always the same.
- Receive the webhook
- Verify the signature
- Handle event
I'm going to show how to do it for Next.js but in general it will be the same for any other framework or language.
Here's the base route handler logic, with comments explaining what each part does. There's nothing fancy happening here, as this is essentially the same example Stripe provides in the docs adapted to Next.js
// src/pages/api/webhook/stripe.js import Stripe from 'stripe' const stripe = new Stripe(process.env.STRIPE_SECRET_KEY, { apiVersion: '2023-10-16', }) export default async function handler(req, res) { if (req.method === 'POST') { // Extract the signature from the headers const sig = req.headers['stripe-signature']; let event // Next.js has already parsed the raw body at this point, // so we have to turn it back into its raw form const buf = await buffer(req) try { // Verify that the event came from Stripe event = stripe.webhooks.constructEvent(buf, sig, process.env.STRIPE_WEBHOOK_SECRET) } catch (err: any) { console.error(`Webhook Error: ${err.message}`) return res.status(400).send(`Webhook Error: ${err.message}`) } // Handle the event switch (event.type) { case 'checkout.session.completed': await handleCheckoutSessionCompleted(event.data.object) break default: console.log(`Unhandled event type ${event.type}`) } res.json({ received: true }) } else { res.setHeader('Allow', 'POST') res.status(405).end('Method Not Allowed') } }
The final part is the implementation of the checkout.session.completed event. Here's the entire code with explanations as to what each part is doing
async function handleCheckoutSessionCompleted(checkout) { // Extract the githubusername custom field const githubUsername = checkout.custom_fields.find( (f) => f.key === 'githubusername', ) if (githubUsername && githubUsername.text?.value) { try { // These values should be changed to whatever your owner and repo are const owner = 'repo-owner' const repo = 'your-repo-name' await addGitHubCollaborator(owner, repo, githubUsername.text.value) console.log( `Granted read permission to ${githubUsername.text.value} for ${owner}/${repo}`, ) } catch (error) { console.error('Error granting GitHub permission:', error) } } } async function addGitHubCollaborator(owner, repo, username): Promise<void> { const response = await fetch( `https://api.github.com/repos/${owner}/${repo}/collaborators/${username}`, { method: 'PUT', headers: { Authorization: `Bearer ${process.env.GITHUB_PERSONAL_ACCESS_TOKEN}`, // This header is non-standard but recommended in the docs // https://docs.github.com/en/[email protected]/rest/collaborators/collaborators?apiVersion=2022-11-28 Accept: 'application/vnd.github+json', }, body: JSON.stringify({ permission: 'read' }), }, ) if (!response.ok) { throw new Error(`Could not grant access to ${username}`) } }
Done! Once deployed, after each successful checkout Stripe will send a webhook to your API and it will automatically grant the customer Github repo access.